
Melted Snowman Peanut Butter Cookies Recipe
Let me tell you, the Melted Snowman Peanut Butter Cookies Recipe is one of those fun and festive treats that’ll instantly brighten your baking day. It’s not just a cookie; it’s a playful winter wonderland on your plate with that perfect peanut butter flavor combined with adorable snowman faces melting into gooey goodness. I love making these around the holidays or for any chilly day when you want something cute yet comforting.
What makes this Melted Snowman Peanut Butter Cookies Recipe truly special is how easy the peanut butter cookie base is to whip up, and then you get to decorate them with the melted chocolate details that make each cookie a tiny masterpiece. Whether you’re baking with kids or just want a conversation starter at your next gathering, these cookies deliver both taste and charm without any fuss.
Ingredients You’ll Need
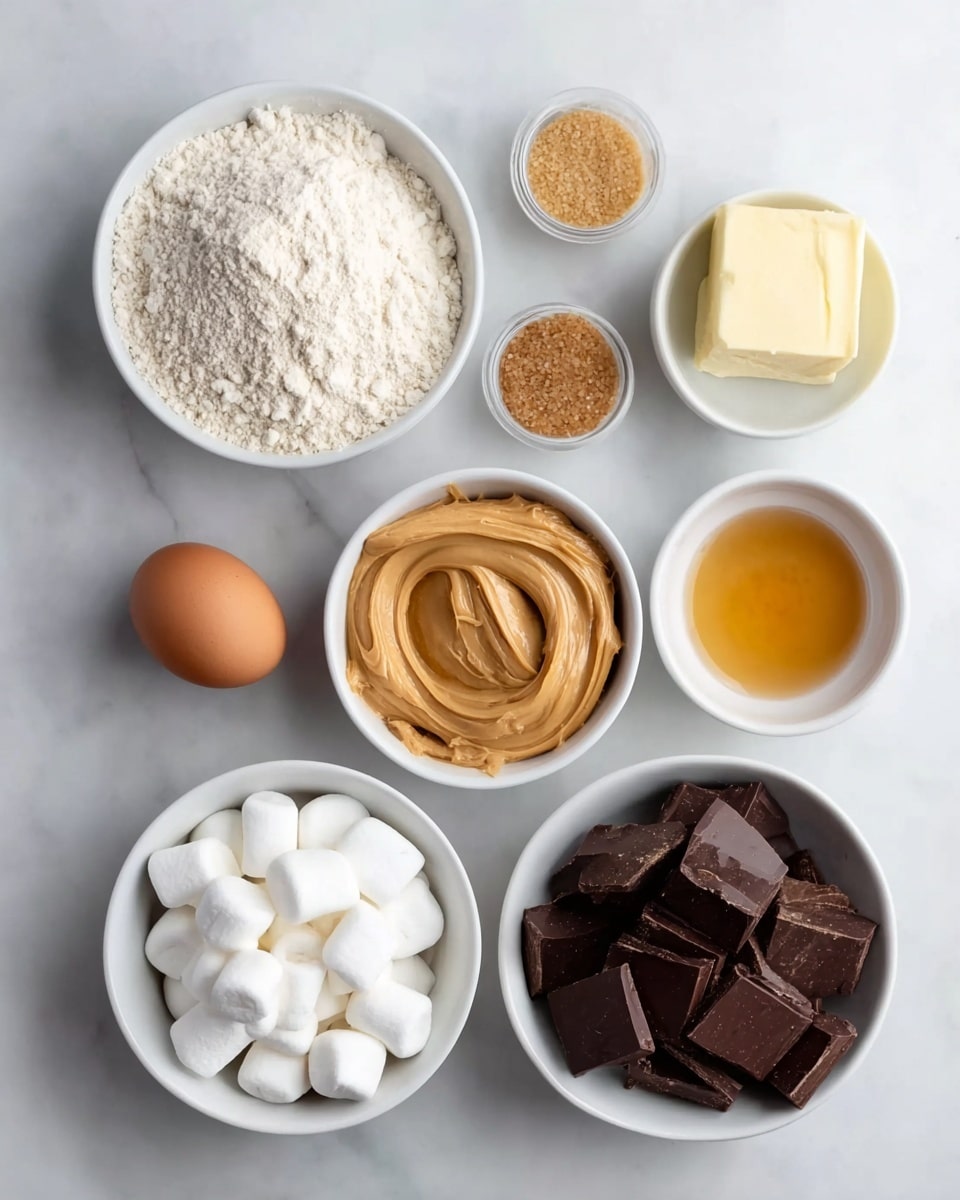
Choosing the right ingredients for these peanut butter cookies is key to nailing that soft, chewy texture and getting your decorations to stick beautifully. Here’s what you’ll gather, along with a few tips to make your shopping trip easier and your cookies better:
- Smooth Peanut Butter: Opt for creamy peanut butter without added sugar for the best cookie texture and flavor balance.
- Butter, softened: Make sure your butter is softened (not melted) to help the dough come together smoothly.
- Brown Sugar: Adds moisture and chewiness with a slight caramel note—don’t skip it!
- Granulated Sugar: For a bit of crispness and sweetness that complements the brown sugar nicely.
- Egg, room temperature: Helps bind your dough; bringing eggs to room temp ensures even mixing.
- Vanilla Extract: Just a splash to bring warmth and depth to those peanut butter notes.
- All-purpose Flour: The backbone of your cookies; scoop carefully to avoid dry dough.
- Baking Powder & Baking Soda: A small lift that keeps your cookies soft but slightly puffy.
- Corn Starch: My secret weapon to tender, melt-in-your-mouth cookies—trust me on this one.
- Salt: Balances sweetness and enhances all the flavors.
- White Chocolate Peanut Butter Cups: These become your snowman’s body, so pick good quality for melting and flavor.
- White Chocolate Chips, melted: For that snowy, creamy surface on the cookie base.
- Black Candy Melts or Semi-Sweet Chocolate Chips, melted: Perfect for outlining eyes and buttons.
- Orange Candy Melts, melted: To give your snowman that classic carrot nose pop.
Variations
I always encourage you to make this Melted Snowman Peanut Butter Cookies Recipe your own. Whether you like things a bit sweeter, nuttier, or you need to adjust for dietary needs, there’s so much room for personalization.
- Gluten-Free Version: I swapped all-purpose flour for a gluten-free blend once, and they came out just as soft and tasty—perfect if you’re baking for friends with gluten sensitivities.
- Vegan Option: Using a plant-based butter and egg alternative worked great for me, just make sure your candy melts are dairy-free too.
- Extra Crunch: Adding chopped peanuts or a sprinkle of sea salt before baking gives the cookies a delightful crunch and extra flavor punch.
- Chocolate Lover’s Twist: Mix in mini chocolate chips to the dough for bursts of chocolate in every bite—I highly recommend it if you’re a chocoholic like me.
How to Make Melted Snowman Peanut Butter Cookies Recipe
Step 1: Cream it Up
Start by beating the softened butter, smooth peanut butter, brown sugar, and granulated sugar together until you get a light, fluffy mixture. This usually takes about 3-4 minutes with an electric mixer. It’s important to cream these well because this step incorporates air that helps your cookies rise softly in the oven.
Step 2: Add the Wet Ingredients
Next, add in the egg and vanilla extract, mixing just until combined. Don’t overmix here; you just want everything blended to a uniform texture. The egg helps bind your dough without making it tough, so that gentle handling goes a long way.
Step 3: Mix the Dry Ingredients
In a separate bowl, sift together the all-purpose flour, baking powder, baking soda, corn starch, and salt. Sifting avoids lumps and ensures an even rise. Then, slowly add these dry ingredients into your wet mixture, mixing on low speed until just combined.
Step 4: Form the Cookie Base
Drop tablespoons of dough onto a parchment-lined baking sheet, spacing them about 2 inches apart because they’ll spread slightly. I like using a cookie scoop for even sizing—it saves so much hassle. Bake at 350°F (175°C) for about 10-12 minutes or until edges start to turn golden, but the centers still feel soft.
Step 5: Let Them Cool and Decorate
Remove the cookies from the oven and while they cool, gently press a white chocolate peanut butter cup into the center of each cookie—that’s your melted snowman’s “body” softening into the cookie base. Then, drizzle or pipe the melted white chocolate chips around the cups for that snowy effect.
For the fun part, use the black candy melts or melted semi-sweet chocolate chips to dot on eyes and buttons, and the orange candy melts for a cute carrot nose. If piping is tricky, try using a toothpick for tiny details—it’s what I always do!
How to Serve Melted Snowman Peanut Butter Cookies Recipe
Garnishes
I love topping these cookies with a light dusting of powdered sugar to mimic that fresh snow look—it’s so simple but so effective. Sometimes, I add a few festive sprinkles around the edges for color, especially if I’m making these for a holiday party.
Side Dishes
Pair your Melted Snowman Peanut Butter Cookies Recipe with a big mug of hot cocoa or a glass of cold milk for the ultimate cozy treat. If you want to get fancy, I’ve also served them alongside a small bowl of mixed nuts or even a scoop of vanilla ice cream—yum!
Creative Ways to Present
One thing I’ve tried is arranging these cookies on a platter decorated with mini marshmallows and powdered sugar “snow,” making the display look like a snowy field of tiny melting snowmen. It’s always a hit when friends come over, and kids get so excited to see their little snowman friends chilling on the table.
Make Ahead and Storage
Storing Leftovers
I keep leftover cookies in an airtight container at room temperature for up to 4 days, and honestly, they stay soft and delicious that whole time. Just make sure you don’t stack them too tightly so the decorations don’t get ruined.
Freezing
If I want to freeze these, I place them on a baking sheet first until solid, then transfer them to a freezer-safe bag. They keep well for about 2 months this way. When I’m ready, I let them thaw at room temperature – the decorations hold up nicely if you’re gentle.
Reheating
To freshen them up, I usually pop the cookies in a warm oven at 300°F for just 3-5 minutes. This revives the softness without melting the decorations too much. You can also microwave a single cookie for about 10 seconds if you want a quick cozy bite.
FAQs
-
Can I use chunky peanut butter for the Melted Snowman Peanut Butter Cookies Recipe?
You can, but keep in mind chunky peanut butter will add texture chunks to the cookie, which some people love for a bit of crunch. If you want a smooth surface for decorating, stick to smooth peanut butter.
-
How do I prevent the white chocolate from seizing when melting?
To prevent seizing, melt your white chocolate chips slowly over a double boiler or in short bursts in the microwave, stirring often. Adding a tiny bit of vegetable oil can help keep it smooth if needed.
-
Can I make these cookies ahead of time for a party?
Absolutely! You can bake and decorate them a day or two ahead. Just store them in an airtight container at room temp, and they’ll remain fresh and festive for your gathering.
-
What if I don’t have candy melts for decoration?
No candy melts? No problem! Semi-sweet or dark chocolate chips work great for the black details, and you can substitute orange with a tiny dab of orange frosting or edible markers.
-
How do I keep the cookies soft and chewy?
The key is not to overbake and to use ingredients like brown sugar and corn starch, which help retain moisture. Also, store your cookies properly once cooled to maintain softness.
Final Thoughts
If I could only recommend one festive cookie recipe to you this season, it would definitely be the Melted Snowman Peanut Butter Cookies Recipe. Making these has brought me so much joy—not just the delicious flavors, but also the smiles when family and friends see those cute melting snowmen. Give this recipe a try; I promise, you’ll savor every bite and maybe even keep them around long after the snow melts.
Print
Melted Snowman Peanut Butter Cookies Recipe
- Prep Time: 20 minutes
- Cook Time: 12 minutes
- Total Time: 32 minutes
- Yield: 9 cookies 1x
- Category: Dessert
- Method: Baking
- Cuisine: American
Description
These Melted Snowman Peanut Butter Cookies are a delightful twist on classic peanut butter cookies, decorated to look like adorable melting snowmen. With a soft and chewy peanut butter base, topped with white chocolate peanut butter cups and detailed candy melts for snowy eyes, buttons, and carrot noses, they are perfect for festive occasions or winter-themed treats.
Ingredients
Peanut Butter Cookie Base
- 1/2 cup smooth peanut butter
- 1/2 cup butter, softened
- 1/2 cup brown sugar
- 1/3 cup granulated sugar
- 1 egg, at room temperature
- 1/2 tsp vanilla extract
- 1 & 1/3 cups all-purpose flour
- 1/2 tsp baking powder
- 1/2 tsp baking soda
- 1 tbsp corn starch
- 1/4 tsp salt
Decoration
- 9 white chocolate peanut butter cups
- 2/3 cup white chocolate chips, melted
- 3 tablespoons black candy melts or semi-sweet chocolate chips, melted
- 1 tablespoon orange candy melts, melted
Instructions
- Prepare the cookie dough: In a mixing bowl, cream together the smooth peanut butter, softened butter, brown sugar, and granulated sugar until light and fluffy. Add the egg and vanilla extract, mixing until fully incorporated.
- Combine dry ingredients: In a separate bowl, whisk together the all-purpose flour, baking powder, baking soda, corn starch, and salt. Gradually add the dry ingredients into the wet mixture, mixing until a soft dough forms.
- Shape and bake cookies: Preheat your oven to 350°F (175°C). Roll the dough into balls and place them on a baking sheet lined with parchment paper, spacing them about 2 inches apart. Bake for 10-12 minutes, or until the edges just start to turn golden. Remove from oven and allow to cool completely on a wire rack.
- Decorate with peanut butter cups: Once cooled, place one white chocolate peanut butter cup on top of each cookie, gently pressing it down to adhere without breaking the cookie.
- Apply white chocolate melt: Melt the white chocolate chips gently using a double boiler or microwave in short bursts, stirring frequently. Drizzle or spread the melted white chocolate over each peanut butter cup to create the snowman’s body appearance. Allow to set.
- Create facial details: Use the melted black candy melts or semi-sweet chocolate chips to pipe on the snowman’s eyes and buttons. Then, using the melted orange candy melts, pipe small carrot noses onto each snowman.
- Set decorations: Let all decorations set completely at room temperature or in the refrigerator before serving to ensure the candy melts harden and the cookies keep their shape.
Notes
- Ensure the egg is at room temperature for better mixing and texture.
- Softened butter should be pliable but not melted for best creaming results.
- Use parchment paper or a silicone baking mat to prevent sticking and promote even baking.
- Temperature control is critical when melting chocolate; heat gently to avoid burning.
- These cookies keep well in an airtight container for up to 5 days.
- For a dairy-free option, substitute butter and white chocolate with vegan alternatives.


