Sheet Pan Quesadillas: Easy, Delicious, and Perfect for a Crowd
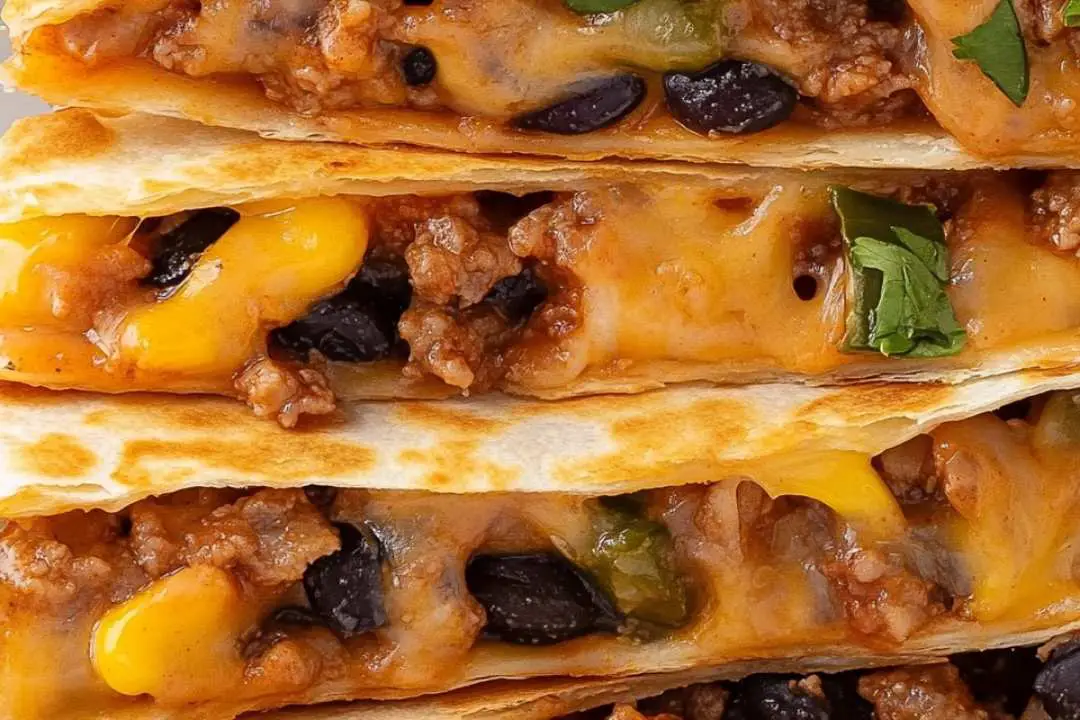
Looking for a fun, effortless way to enjoy quesadillas? These Sheet Pan Quesadillas are the answer! This recipe takes the classic quesadilla to a whole new level, turning it into a family-friendly, crowd-pleasing meal with minimal effort. Loaded with melted cheese, savory fillings, and crispy edges, they’re baked on a single sheet pan for easy assembly and cleanup. Perfect for a quick weeknight dinner or a party snack!
Personal Story & Background
Quesadillas have always been one of my go-to meals, whether for a busy weeknight dinner or a lazy weekend snack. But as much as I love the traditional method of making them one at a time on the stovetop, I found myself wishing for a quicker and easier way to feed a crowd. That’s when I came up with the idea for sheet pan quesadillas!
The beauty of this recipe is that you get all the cheesy, crispy goodness of quesadillas, but in a fraction of the time. You don’t have to stand over the stove flipping individual quesadillas; just load everything onto one sheet pan and bake it! The result is a crispy, cheesy masterpiece that’s perfect for sharing. Whether it’s for taco night, a game day snack, or just an easy dinner, these quesadillas are always a hit.
Ingredient Notes
For the Quesadillas
- Flour Tortillas: Soft flour tortillas are the best choice for quesadillas. They hold up well when baked and get crispy around the edges. Use large tortillas for the sheet pan method.
- Cheese: A blend of shredded cheese works best! I recommend using a combination of cheddar and Monterey Jack for a melt-in-your-mouth texture, but feel free to use your favorite cheeses.
- Protein (Optional): You can add cooked chicken, ground beef, or even beans for extra filling. If you’re making it vegetarian, try adding roasted vegetables, black beans, or sautéed mushrooms.
- Bell Peppers and Onions: These add sweetness and texture, making the quesadillas even more flavorful. You can also swap them for other vegetables like zucchini or corn.
- Taco Seasoning: A packet of taco seasoning (or your homemade blend) brings all the classic flavors to the quesadillas. You can add more or less depending on how spicy you like your food.
- Butter: Butter helps to crisp up the tortillas while baking and adds a touch of richness.
- Sour Cream and Salsa: These are optional for serving but make the perfect accompaniments to cut through the richness of the quesadillas.
Substitutions:
- Tortillas: If you prefer, you can use corn tortillas, though they’re a little more fragile when baking in this method.
- Protein: Use rotisserie chicken, seasoned ground beef, or shredded pork as your protein. For a vegetarian option, black beans, sautéed mushrooms, or even sweet potatoes work great.
- Cheese: If you’re dairy-free, try a plant-based cheese blend for melting.
Step-by-Step Instructions
Step 1: Preheat the Oven and Prepare the Ingredients
- Preheat your oven to 400°F (200°C).
- Slice the bell peppers and onions into thin strips. If you’re using any protein, cook it ahead of time and set it aside.
- Grate your cheese (or use pre-shredded cheese) and get your taco seasoning ready.
Step 2: Assemble the Quesadillas
- Place a large sheet pan on a flat surface. Lay out a large flour tortilla on the pan, then sprinkle a layer of cheese on top.
- Add your fillings: scatter some bell peppers, onions, and your choice of protein (chicken, beef, beans, etc.) on top of the cheese. Sprinkle some taco seasoning for extra flavor.
- Place a second tortilla on top and gently press down. Repeat with another tortilla and layer of cheese, fillings, and seasoning for the second half of the pan.
- If you’re making a double layer (as you typically would with a sheet pan), cover the entire surface of the sheet pan with tortillas, cheese, and fillings, ensuring the second layer sits comfortably on top of the first.
Step 3: Bake the Quesadillas
- Lightly butter the top of the tortillas to help them crisp up in the oven.
- Bake the quesadillas in the preheated oven for 10-12 minutes, or until the tortillas are golden brown and crispy, and the cheese is melted. You may want to check after 8-10 minutes and rotate the pan for even cooking.
Step 4: Slice and Serve
- Remove the sheet pan from the oven and let the quesadillas cool for a few minutes.
- Using a sharp knife or pizza cutter, slice the quesadillas into wedges. Serve with a side of sour cream, salsa, or guacamole for dipping.
Expert Tips for the Best Results
- Layer the Cheese: Don’t skimp on the cheese! Make sure to add cheese to both the bottom and top layers of the tortillas so that you get melty goodness throughout.
- Watch the Tortillas: Keep an eye on your tortillas as they bake. If they’re golden brown and crisp on the outside, but you want a bit more crunch, broil them for 1-2 minutes at the end to get them extra crispy.
- Use a Large Sheet Pan: A large sheet pan allows you to use bigger tortillas and get that perfect crispiness. If you don’t have one, use two smaller sheet pans.
- Don’t Overstuff: You want to make sure the fillings are evenly spread out, so don’t overload your tortillas with too many fillings. A little goes a long way in this recipe.
- Optional Toppings: Once the quesadillas are out of the oven, top them with chopped cilantro, fresh lime wedges, or a sprinkle of chili powder for an extra flavor boost.
Serving Suggestions
- Sides: Serve your sheet pan quesadillas with a side of Mexican rice, refried beans, or a fresh green salad for a well-rounded meal.
- Dips: Guacamole, salsa, and sour cream are perfect for dipping. For a twist, try adding a spicy sriracha mayo or chipotle ranch dipping sauce.
- Drink Pairing: A refreshing margarita or a cold iced tea pairs wonderfully with these quesadillas.
Storage and Reheating Tips
- Storing: Store leftover quesadillas in an airtight container in the fridge for up to 2-3 days.
- Freezing: You can freeze leftover quesadilla slices in a freezer-safe container for up to 1 month. When ready to eat, just reheat in the oven for a few minutes.
- Reheating: To reheat, place them in the oven at 350°F for 5-7 minutes or until the cheese is melted and the tortilla is crispy again. You can also reheat in a skillet over medium heat, flipping once for a crispy finish.
Frequently Asked Questions
- Can I use corn tortillas instead of flour?
Yes, you can! However, corn tortillas are a little more fragile, so they may crack during baking. Use them with caution, or stick with the sturdier flour tortillas for best results. - Can I add more fillings?
Absolutely! Feel free to get creative with your fillings. Roasted vegetables, grilled chicken, or even bacon can all be great additions. Just make sure not to overstuff the quesadillas. - Can I make these ahead of time?
Yes! You can assemble the quesadillas ahead of time and store them in the fridge until you’re ready to bake them. Just bake them as directed when you’re ready to serve.
Conclusion
These Sheet Pan Quesadillas are a game-changer for anyone who loves the classic quesadilla but wants an easier, quicker way to make it for a crowd. With layers of gooey cheese, savory fillings, and a crispy, golden crust, they’ll quickly become a family favorite. Whether it’s taco night, a casual get-together, or just a weeknight dinner, these quesadillas are guaranteed to impress. Let me know how it goes, and feel free to add your own unique twist to the recipe!
Print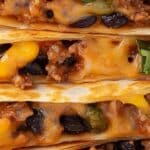
Sheet Pan Quesadillas: Easy, Delicious, and Perfect for a Crowd
- Prep Time: 10 minutes
- Cook Time: 12-15 minutes
- Total Time: 25 minutes
- Yield: 8–10 servings (increased from standard portions) 1x
- Category: Appetizer / Main Dish
- Method: Baking
- Cuisine: Mexican-Inspired
- Diet: Vegetarian
Description
Looking for a fun, effortless way to enjoy quesadillas? These Sheet Pan Quesadillas take the classic favorite to a whole new level! With layers of melted cheese, savory fillings, and crispy edges, they’re baked on a single sheet pan for easy assembly and cleanup. Perfect for a quick weeknight dinner or a party snack!
Ingredients
For the Quesadillas
- 6 large flour tortillas
- 2 cups shredded cheese (cheddar + Monterey Jack or your favorite blend)
- 1 1/2 cups cooked protein (shredded chicken, ground beef, black beans, or sautéed mushrooms)
- 1 bell pepper, thinly sliced
- 1/2 onion, thinly sliced
- 1 tbsp taco seasoning (store-bought or homemade)
- 2 tbsp melted butter (for crisping)
For Serving (Optional)
- Sour cream
- Salsa or guacamole
- Chopped cilantro & lime wedges
Instructions
Step 1: Preheat the Oven & Prep Ingredients
- Preheat your oven to 400°F (200°C).
- Slice the bell pepper and onion into thin strips.
- If using protein, ensure it is pre-cooked and seasoned.
Step 2: Assemble the Quesadillas
- Place a large sheet pan on a flat surface.
- Lay 3 tortillas across the sheet pan, slightly overlapping so they hang over the edges.
- Sprinkle a layer of cheese, protein, bell peppers, and onions evenly across the tortillas.
- Add taco seasoning for extra flavor.
- Place 3 more tortillas on top, covering the filling, and fold the overhanging tortillas over to seal.
Step 3: Bake Until Crispy
- Brush the top of the tortillas with melted butter.
- Place another sheet pan on top (to press them down) and bake for 10-12 minutes.
- Remove the top pan and bake 2-3 more minutes for extra crispiness.
Step 4: Slice & Serve
- Let the quesadillas cool for a few minutes, then slice into squares.
- Serve with sour cream, salsa, or guacamole.
Notes
- For extra crispiness: Broil for the last 1-2 minutes.
- Don’t overfill: Too much filling can make them harder to crisp up.
- Dairy-Free Option: Use a plant-based cheese alternative.
- Make it spicier: Add diced jalapeños or hot sauce.
Nutrition
- Serving Size: 1 slice (~⅛-⅒ of pan)
- Calories: ~280 kcal
- Sugar: 2g
- Sodium: 450mg
- Fat: 12g
- Saturated Fat: 6g
- Unsaturated Fat: 5g
- Trans Fat: 0g
- Carbohydrates: 30g
- Fiber: 3g
- Protein: 15g
- Cholesterol: 40mg