Cookies & Cream Red Velvet Brownies: A Decadent Twist on a Classic
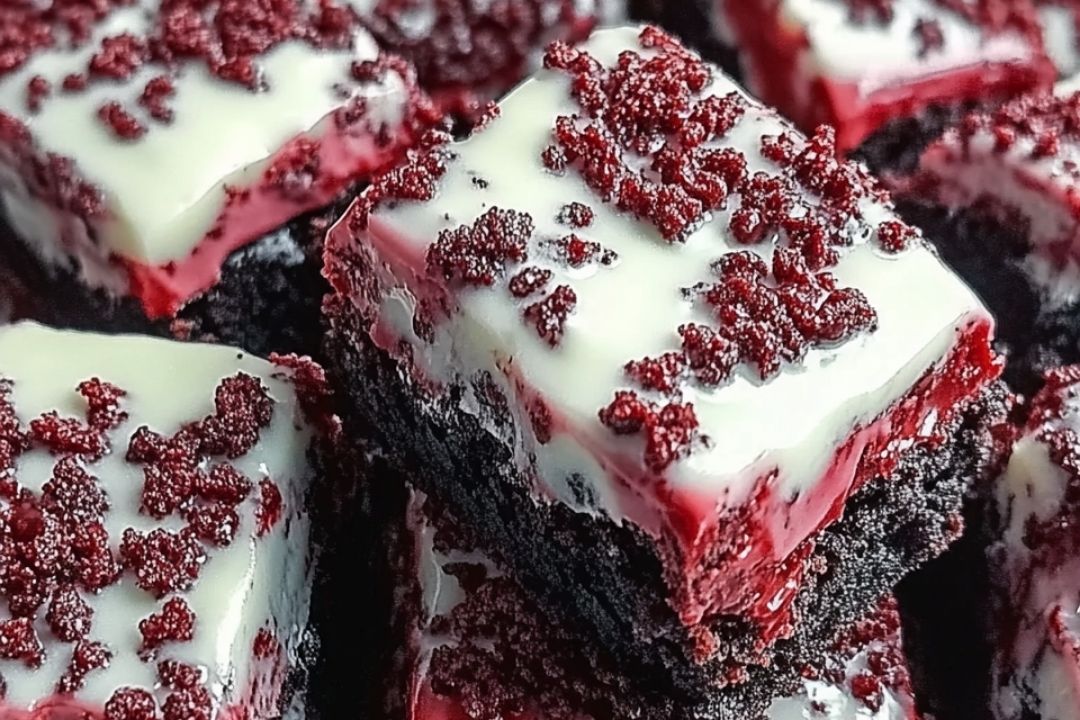
These Cookies & Cream Red Velvet Brownies are the ultimate indulgence. With the rich, velvety flavor of red velvet, creamy swirls of cheesecake, and crunchy bits of Oreo cookies, they’re a show-stopping dessert that will satisfy every craving. Perfect for any celebration, these brownies are as beautiful as they are delicious, offering the best of both worlds in every bite!
Personal Story & Background:
I’ve always been a sucker for anything red velvet, but one day I thought, “Why not give red velvet a fun twist and combine it with some of my favorite treats?” That’s how these Cookies & Cream Red Velvet Brownies were born. I was inspired by the creamy richness of cheesecake, the irresistible crunch of Oreos, and of course, the deep red flavor of red velvet cake. I was hoping to make something that was both easy to put together and a guaranteed crowd-pleaser. These brownies quickly became a family favorite. The moment you take a bite, you get a balance of textures—the soft, fudgy brownie, the creamy, tangy swirl, and the satisfying crunch of Oreo cookies. Trust me, these brownies are a fun and indulgent dessert you’ll want to make again and again!
Ingredient Notes:
- Red Velvet Cake Mix: The base of these brownies comes from a box of red velvet cake mix. It gives the brownies that signature red color and rich flavor, with minimal effort required. You can substitute it with homemade red velvet cake batter if you prefer.
- Butter: The butter helps create a rich, moist texture in the brownies. Make sure to melt it before adding it to the batter for a smooth consistency.
- Eggs: Eggs are essential for binding the brownies and giving them their structure. They also add to the fudgy texture.
- Oreos: These provide that delicious crunch and contrast to the soft brownies and creamy swirl. I love using regular Oreos, but feel free to try the golden or mint variety for a fun twist!
- Cream Cheese: For the cheesecake swirl, cream cheese adds a rich, tangy flavor and a smooth texture. Make sure it’s softened so it blends seamlessly into the batter.
- Heavy Cream: This is used to make the cream cheese swirl extra smooth and creamy. You can substitute with milk if needed, though heavy cream gives a richer texture.
- Sugar: A bit of sugar sweetens the cheesecake swirl and balances the tanginess of the cream cheese.
Substitutions:
- Dairy-Free: Use a dairy-free cream cheese and milk substitute, and swap the butter for a plant-based alternative.
- Gluten-Free: Try using a gluten-free red velvet cake mix for a gluten-free version of these brownies.
Step-by-Step Instructions:
Step 1: Prepare the Red Velvet Brownie Base
Preheat your oven to 350°F (175°C). Grease a 9×9-inch baking pan with cooking spray or line it with parchment paper for easy removal. In a large bowl, combine the red velvet cake mix, 1/2 cup melted butter, 2 eggs, and 1/4 cup water. Stir until everything is fully incorporated and the batter is smooth. The batter will be thick—this is normal!
Step 2: Add the Oreos
Coarsely chop about 8-10 Oreos (or more, depending on how many you want to add) into smaller chunks and fold them into the brownie batter. This adds a nice, crunchy texture to the brownies.
Step 3: Make the Cream Cheese Swirl
In a separate bowl, combine the softened cream cheese, 1/4 cup sugar, and 1/4 cup heavy cream. Use an electric mixer to blend until smooth. Add 1 egg and mix again until fully combined. This will create your creamy swirl mixture.
Step 4: Assemble the Brownies
Pour the red velvet brownie batter into the prepared pan and spread it evenly. Then, spoon the cream cheese mixture in dollops over the brownie batter. Use a butter knife or a skewer to swirl the cream cheese into the brownie batter, creating a marbled effect. Don’t overdo the swirling—just a few swirls for a beautiful contrast!
Step 5: Bake the Brownies
Bake the brownies for 30-35 minutes, or until a toothpick inserted into the center comes out with just a few moist crumbs (not wet batter). You want them to be set, but still soft and fudgy. Be careful not to overbake, as they’ll continue cooking a little bit once you remove them from the oven.
Step 6: Cool and Serve
Allow the brownies to cool completely in the pan on a wire rack before cutting into squares. This will help the cream cheese swirl set and make it easier to slice. Once cooled, cut into 16 squares and serve!
Expert Tips for the Best Results:
- Do Not Overmix the Batter: When mixing the brownie batter, mix just until everything is combined. Overmixing can result in a denser texture.
- Swirl Gently: When adding the cream cheese mixture, swirl gently to create that marbled effect. Too much swirling will mix the two layers together and prevent that beautiful contrast.
- Let Cool Completely: If you try to cut the brownies while they’re still warm, the cream cheese layer might ooze out. Let them cool for at least an hour before slicing for neat, clean cuts.
Serving Suggestions:
- With Ice Cream: These brownies are perfect served warm with a scoop of vanilla ice cream or chocolate ice cream for a delicious dessert.
- Topped with Whipped Cream: A dollop of freshly whipped cream adds an extra creamy element that pairs beautifully with the tangy cream cheese swirl.
- For a Party: These brownies are perfect for parties, potlucks, or any special occasion. Serve them on a platter with other bite-sized desserts for a dessert table that will impress your guests.
Storage and Reheating Tips:
- Room Temperature: Store leftover brownies in an airtight container at room temperature for up to 3 days. They’ll stay moist and delicious.
- Freezer: You can freeze these brownies! Wrap them tightly in plastic wrap and place them in a freezer-safe container for up to 3 months. When you’re ready to enjoy, let them thaw at room temperature or pop them in the microwave for a few seconds.
Frequently Asked Questions:
Can I make these brownies without the Oreos?
Yes, you can leave out the Oreos or replace them with another type of cookie, such as chocolate chip cookies or graham crackers. You could also skip the cookies altogether for a simpler red velvet cream cheese brownie.
Can I use a homemade red velvet cake mix?
Of course! If you prefer to make your own red velvet cake batter from scratch, go ahead and use your favorite recipe. Just make sure the batter is similar in consistency to a box cake mix.
How do I know when the brownies are done baking?
Check the center of the brownies with a toothpick. If it comes out with a few moist crumbs, but not wet batter, they’re done. They’ll continue to set up as they cool.
Conclusion:
These Cookies & Cream Red Velvet Brownies are everything you could want in a dessert—rich, creamy, and full of flavor. Whether you’re baking them for a special occasion or just treating yourself to something sweet, they’re sure to be a hit. I hope you enjoy making and eating these decadent brownies as much as I do. Don’t forget to share your version in the comments—I’d love to hear how they turn out! Happy baking!
Print
Cookies & Cream Red Velvet Brownies: A Decadent Twist on a Classic
- Prep Time: 10 minutes
- Cook Time: 30-35 minutes
- Total Time: 45 minutes
- Yield: 16 brownies 1x
- Category: Dessert
- Method: Baking
- Cuisine: American
- Diet: Vegetarian
Description
These decadent Cookies & Cream Red Velvet Brownies combine the rich flavor of red velvet, creamy cheesecake swirls, and crunchy Oreo pieces for the ultimate dessert. Perfect for parties, holidays, or satisfying a sweet tooth!
Ingredients
For the Red Velvet Brownie Base:
- 1 box red velvet cake mix
- 1/2 cup melted butter
- 2 eggs
- 1/4 cup water
- 10 Oreos, coarsely chopped
For the Cheesecake Swirl:
- 8 oz (1 block) cream cheese, softened
- 1/4 cup granulated sugar
- 1/4 cup heavy cream
- 1 egg
Instructions
-
Preheat & Prep:
- Preheat oven to 350°F (175°C).
- Grease a 9×9-inch baking pan or line it with parchment paper.
-
Make the Brownie Batter:
- In a large bowl, combine red velvet cake mix, melted butter, eggs, and water.
- Mix until smooth (batter will be thick).
- Fold in chopped Oreos and set aside.
-
Make the Cheesecake Swirl:
- In a separate bowl, beat cream cheese, sugar, and heavy cream until smooth.
- Add the egg and mix until fully incorporated.
-
Assemble the Brownies:
- Spread the red velvet brownie batter evenly in the prepared pan.
- Spoon dollops of the cheesecake mixture on top.
- Use a knife to gently swirl the cheesecake into the brownie batter for a marbled effect.
-
Bake:
- Bake for 30-35 minutes, or until a toothpick inserted in the center comes out with a few moist crumbs.
- Be careful not to overbake!
-
Cool & Serve:
- Allow brownies to cool completely before slicing.
- Cut into 16 squares and enjoy!
Notes
- Swirl lightly: Overmixing will blend the layers instead of creating a marbled look.
- Check doneness carefully: The center should be set but still slightly soft.
- Let them cool: Cutting warm brownies can cause the cream cheese swirl to become messy.
Nutrition
- Serving Size: 1 brownie (1/16th of the batch)
- Calories: ~230 kcal
- Sugar: 18g
- Sodium: 180mg
- Fat: 12g
- Saturated Fat: 7g
- Unsaturated Fat: 4g
- Trans Fat: 0g
- Carbohydrates: 26g
- Fiber: 0.5g
- Protein: 3g
- Cholesterol: 45mg